Account Setup
Estimated reading time: 5 minutes
How do I create an account and set up my organization in clariBI? This page covers registration, the onboarding wizard, and basic profile settings.
Creating Your Account
Visit claribi.com/app/register and fill in your first name, last name, email, organization name, and password (with confirmation). Click Create account. You will receive a verification email - click the link inside to activate your account. You can also sign up using Google or Facebook from the registration page.
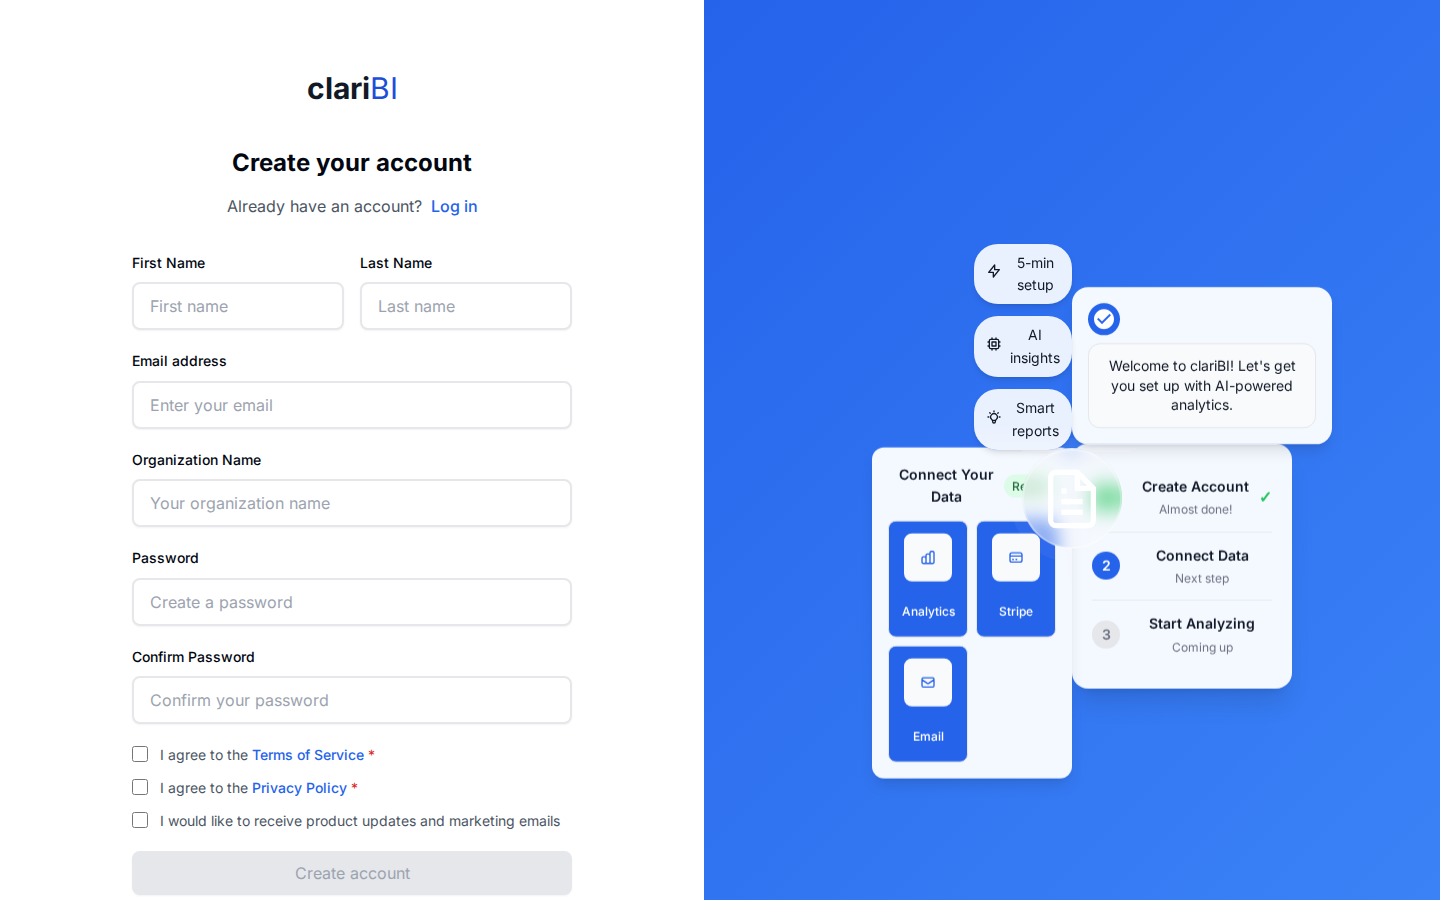
Every new account starts on a 14-day free trial with these limits:
- 1 user seat
- 50 AI credits
- 3 data source connections
- 1 GB storage
- 5 file uploads
- 40 OCR pages
No credit card is required to start. When the trial ends, your account moves to the Free tier - you keep access to your data, pre-computed insights, basic analytics, goal tracking, and up to 3 data sources with no time limit. Upgrade to a paid plan any time to add AI-powered analysis and additional capacity. See Subscription Plans for details.
The Onboarding Wizard
After your first login, a five-step onboarding wizard guides you through setup:
Welcome
An introduction to clariBI highlighting key capabilities: AI-powered analysis, real-time insights, and team collaboration. Click Get Started to proceed, or Skip for now to go straight to the app.
Choose Template
Pick an analysis template that matches your business needs. Templates determine which data sources are recommended and what kind of analysis is generated.
Connect Data Sources
Based on your chosen template, connect the recommended data sources or use sample data. For each required source, you can click Connect to link your real data, or Use Sample Data to explore with pre-loaded examples. You can also skip onboarding entirely and add data sources later.
AI Analysis
clariBI processes your connected data automatically. You will see a progress indicator as the system connects to data sources, prepares data, runs AI analysis, and processes the results. This typically takes 10-30 seconds.
Complete
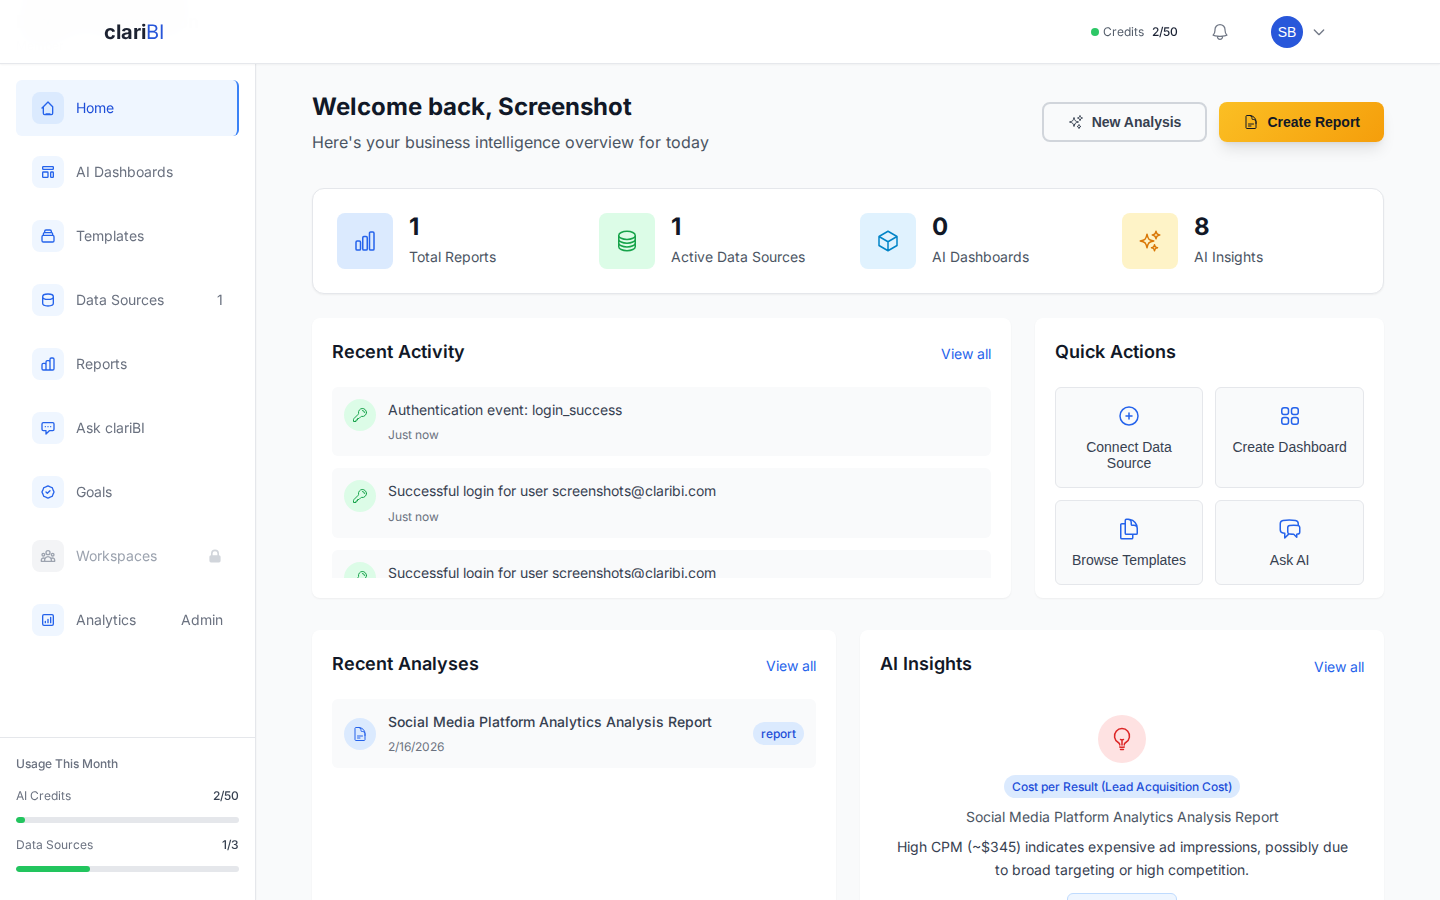
Your initial insights are ready. Review the results and continue into the app to explore your data further.
Editing Your Profile
After onboarding, open the user menu (your avatar in the top-right corner) and select Settings to update your name, email, avatar, and notification preferences. Organization-level settings like billing and team management are also in Settings if you have the Owner or Administrator role.
Pro Tip
Enable multi-factor authentication (MFA) early. It is available on Professional and Enterprise plans and adds a second layer of security to your account. See MFA Setup.
Next Steps
Ready to try clariBI?
Start for free or begin a 14-day trial with full AI-powered analytics. No credit card required.